Engraving Plastic
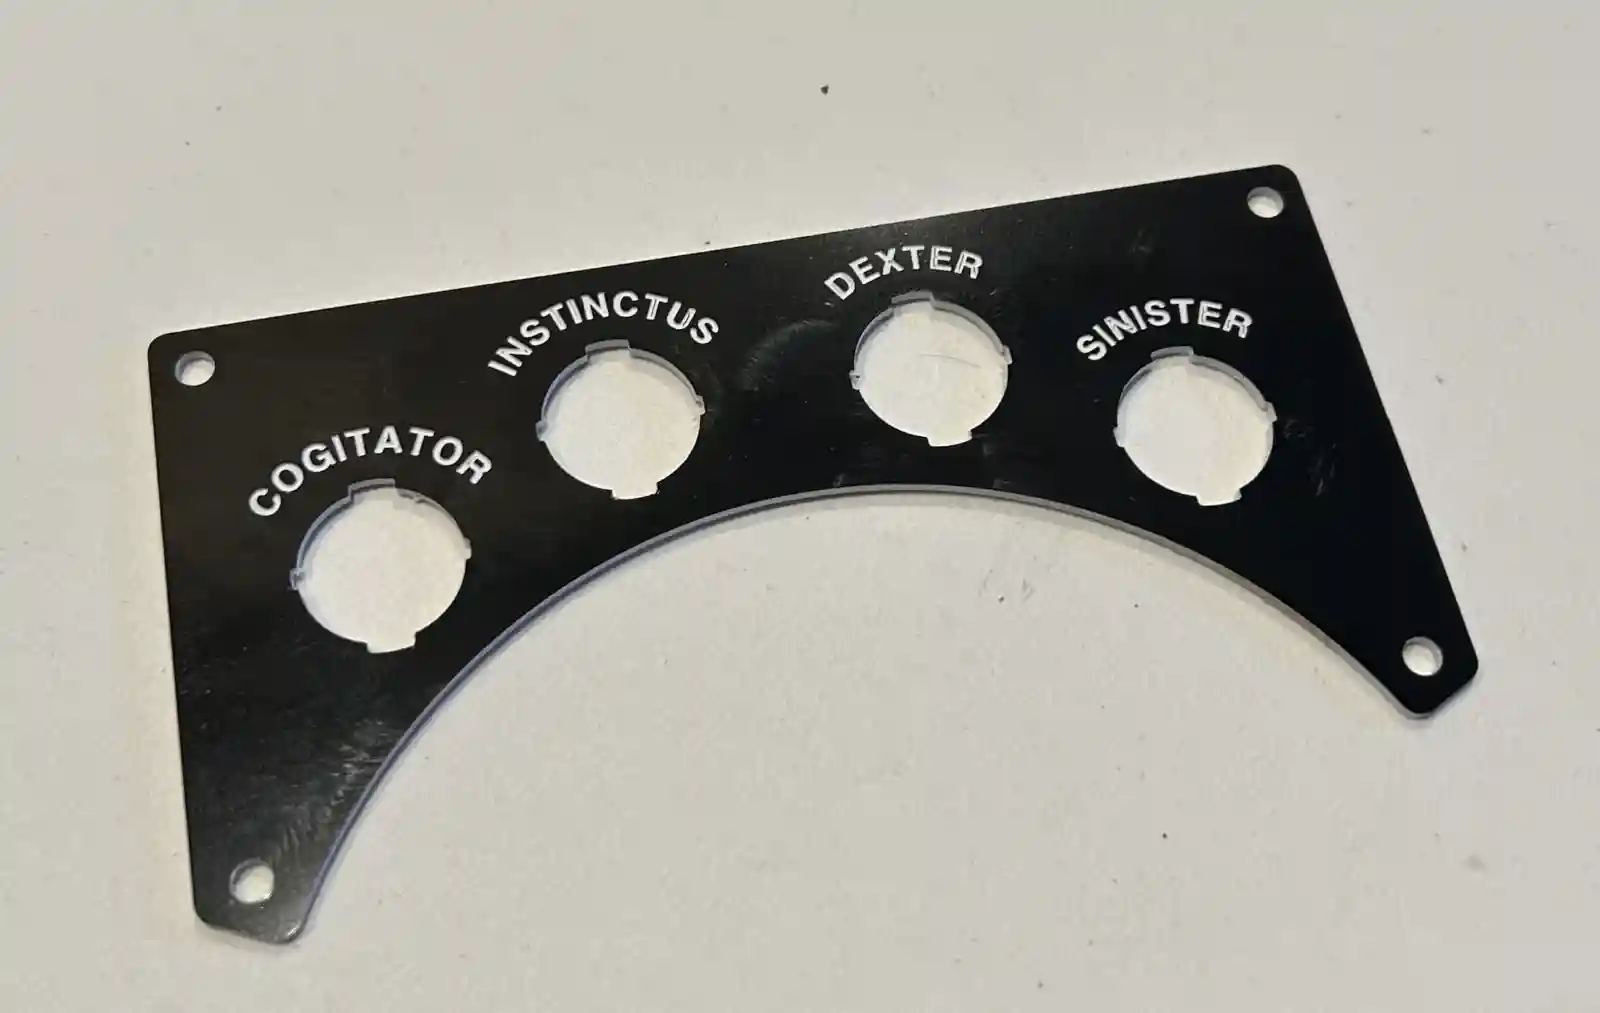
I wanted to add some nice labels for the various switches and knobs that will find their way onto Calvin. Currently, that means 4 power switches — one for each motor (Sinister and Dexter), one for the Teensy (Instinctus), and one for the Jetson Orin Nano (Cogitator). I thought I’d give the Carvera another run and use an engraving bit on some engraving plastic (the stuff where you machine away the top layer to reveal a different color underneath).
I ran into a couple of problems. One is that getting Autodesk Fusion to make decent toolpaths for this is not easy or obvious. You have to do a lot of guessing and trial and error. The second is that the plastic will melt and gum up the bits easily, which I found out when cutting the holes. It takes a combination of light but decisive cuts with a single-flute end mill to get it done well. Over time the bit heats up, and the plastic doesn’t transfer heat well, so it melts. Long-running operations may have to be broken up.
The combination I found that worked for the engraving was to use a 15°, 0.2 mm tip D-bit with the Engraving operation, setting the Bottom Height in Fusion to −0.1 mm from the Top Height (the same depth as the modeled text). It’s also very finicky about the font. I had the best luck with Helvetica Bold at 2.5 mm text height. Strangely, Arial did not work well at all.
Eventually I got it right, and I think the plate came out well.